FRAMING INSTRUCTIONS - (very detailed) - by Susan Saltzgiver
Preparing to Mount
I put everything on foam core / foam board (AC Moore, Michaels, Hobby Lobby,
Wal-Mart, etc). Foam board without the outside is cheaper, but not as strong. I prefer the
"FOAMCORE". (Some have changed to just 'foam board' with no covering, and it can be
used, but the "foam core" is stronger.)
Always allow at least 3" of fabric on all sides of the design (that's 6" added to both
dimensions of the design). Allow 1" all the way around the design when determining the
size to cut the foam core (I use a sharp craft knife, metal edged ruler, cutting board
for nice straight edges - and several strokes of the knife, rather than trying to cut all
the way through at once.) If the design is an 'odd' size, decide now what size you want
to use as standard frames are much less expensive than custom frames.
Glue moderately thin batting (I use poly cotton - Joann's) onto one side of the foam
core. (I used to use white glue, but found the warping a problem. I changed to rubber
cement and that resolved that problem. Glue sticks may also be used.)
Press (with an iron) the design from the back on a plush towel (makes the stitches
stand out) and enhances the appearance of the finished stitchery.
Measure the design. Calculate the difference between the design size and the cut
foam core. Divide each difference by 2 so the design is centered. Change that
dimension to number of threads, according to the fabric you are using. Count threads
from the edge of the design to the edge of the mounting board. Add a few threads
(2-4 or more, depending on the fabric you are using and how tight you want the finished
results - you develop a 'feel' for what works for you.)
Mounting
Using sequin pins (1/2"- craft shop - 400 pins / pack - inexpensive) and following
the thread you have determined, press the sequin pins into the edge of the foam core -
corners first, middles of each side, then keep going around adding pins - every 4
stitches on Aida, 8 stitches in 28 count linen or even weave fabric. If the design is
large, put pins in between the middles and the corners before adding the individual pins
to help keep the fabric even. Remember, these pins can be moved if necessary. If
mounting linen it helps to leave the pin heads stick 'out' a little bit to keep them from
popping through the fabric and not holding.
When 'pinned' closely the whole way around, the design should look nice and even
and not be so tight that the foam core bends forward.
I use masking tape perpendicular to the edges of the fabric (tried along the edge
and it peeled up) to secure those edges on the back of the foam core. (Other tape that
holds the fabric to the foam core securely may be used.) Little strips of the tape hold
securely to the foam core. Each should be 2-3" long - at least an inch (or more) should
be on the fabric. Use quite a few pieces to make it secure. (If pins are sticking out,
now is the time to push them in the whole way.)
Placing in frame
If using a frame, the finished product should fit right into the right size frame (you
can always fit the foam core into the frame when it is cut - it should have a little 'play'
to allow for the fabric, but the fabric is not very thick, so not a lot of excess space is
needed).
| Framing for Yourself MY WAY |
| Copyright 2011-2012-2013-2014-2015-2016-2017-2018-2019-2020-2021 ~ ~ ~ Susan Saltzgiver Designs ~ ~ ~ Copyrighted material (images, text) may not be reproduced by any means other than needle and thread. They are protected by copyright laws and to do so is prosecutable by law. Last updated 1/7/2021 |
| Please let me know via the contact page if you found these instructions helpful / useful. |

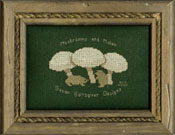
| Framing Instructions According to Susan Saltzgiver Designs Mushrooms and Moles |
| When we stitch we are like mushrooms and moles - Our best work is done while we are 'hidden away'. |
Since the back of a framed piece should be covered, the appearance of the back will not 'show' in a
properly framed piece.
If using glass, clean and insert into frame. Apply spacer bars to the glass snugly along the edges of the indentation
of the frame.
Insert the mounted stitchery into the frame. Make sure (the glass if used is clean and) the stitchery
appears through the front of the frame as desired.
Secure the stitchery in place. (I use a large outdoor type stapler, pressing along the edge of the stitchery
and stapling into the inside edge of the frame, but NOT into or through the stitchery.) Apply one staple along
each side. (The staples should stick out a bit and hold the stitchery securely in place.) Look in the front to be
sure the stitchery looks OK in the frame. Then insert a few more staples, one in each side of the frame at a
time - being sure each corner is secure and does not stand away from the front of the frame. Do not add so
many staples that the integrity of the frame is jeopardized.
Covering Back (Dust Cover)
Cut a piece of craft paper slightly larger than the frame.
Using white glue, squeeze a bead of glue around the back surface of the frame. Spread the glue out
toward the inside edge of the frame. Apply the craft paper to the glue, nice and smoothly. Rub all edges to
be sure of attachment to frame. Using a metal edged ruler and craft knife, score the craft paper the whole
way around at 1/2 the width of the frame. Remove the excess craft paper. Using a damp cloth, remove
exposed white glue.
Hanging Wire
Measure the side of the frame. Divide measurement by 3. Measure down from top of frame (make sure
this is the top) 1/3 the length of a side (the number you got when you divided by 3). Make a small mark at 1/2
the width of the frame. Insert a screw eye at the location of the mark and screw in to base of ‘eye’. Do the
same thing on both sides. End with the ‘eye’ openings being across from each other.
Cut a piece of picture wire (a multi strand wire) twice as long as the distance between the two screw eyes.
Insert the picture wire through the two eyes, pulling the wire taut and having the ends even. Bend both
ends toward the center. Take each end of the wire back through the loop of the screw eye two times (each)
and pull the wires tight each time (I always put one twist up and one down in the screw eye, against the frame).
Then keep going around the hanging wire and pulling the loose ends toward the screw eye after each wrap to
make a nice consistent, tight wrap, until the loose wire is used up.
Now you are ready to hang up your framed piece to be enjoyed by all, and you can have the pride of knowing
you did it all yourself.